Saturday, February 25, 2012

Vintage Wheels Block of the Month

Block nine is ready to post and I hope the girls like the fabrics I have used this month. For the romantic Roses kits there is  pretty pink French General fabric for the centre with dark mauve and green spokes. The Japanese blocks have a crazy patchwork styled peach/pink floral on a black background as their centre and  peach/pink and green spokes.


I have designed several borders that may be used with these blocks. This month the participants will get a pattern for the first of these designs with their kits as well as a sample of the fabric I used. Contact me if you are interested in purchasing this fabric for your borders.


Monday, February 20, 2012

Time for some hand quilting!

There was a time I handquilted every top I made but those days are over. In the late nineties I began machine quilting most of my quilts but always had a handquilting project on the go. When my friend, Elaine started her quilting business"Quilting in the Vines" I started handing my tops to her for a quick and professional finish. It's always exciting to get the tops back from her and see how she has transformed them with amazing quilt designs I could never have done myself.
I don't want to lose my machine quilting or handquilting skills so I try and use them every now and then. The perfect opportunity for handquilting has presented itself. Only the most traditional tops that I feel deserve the time and effort are chosen for this treatment now. On my last 'very special' Birthday I received 14 beautifully hand appliqued blocks from one of my lovely Sewing Groups. I made an extra block and another friend, Sheridan made the 16th block. I now have the perfect number to put together into four rows of four blocks. I think you'll agree they are the perfect handquilting project to create an antique styled quilt.


A close-up of one of the blocks

Last night I added a 2" border of a lovely reproduction tone-on-tone fabric between all the blocks and 3" around the edges so the circles would float. Now I need to find some wadding that is recommended for handquilting.


Tuesday, February 14, 2012

Happy Valentines Day


                             Happy Valentines Day to my lovely quilting friends! xx

A little wallhanging I made 16 years ago!

Monday, February 13, 2012

Split Nine-Patch Tutorial


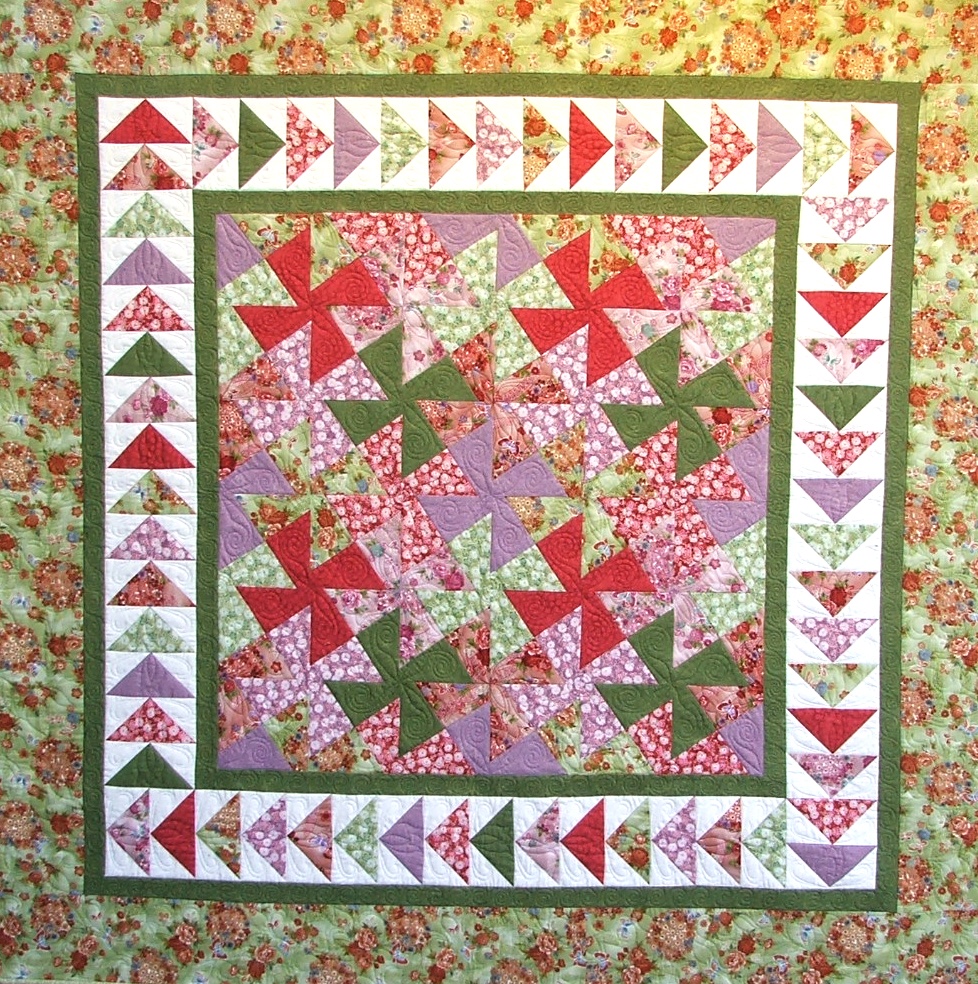
The ‘Split Nine-Patch’ or ‘Disappearing Nine-Patch’ is a fairly recent design that is doing the rounds of quilting circles. It has been duplicated by many and seems to be evolving all the time.  I have written instructions to make it my way (which is usually the quickest, easiest way!)

You need nine different fabrics for the nine-patches in 6 ½” strips. Two strips of each fabric, one the WOF and one half the WOF. There should be one fabric that stands alone, like a zinger or a darker fabric. You should use this as the centre square.
Then there should be four light and four dark co-ordinating fabrics.
The darker fabrics are your corner squares and the light fabrics are the central side squares.
70 cm fabric for the thin border and the binding
90 cm fabric for the final border
Sewing Instructions
Take the nine fabrics that are already cut in 6 ½” strips and decide how they should be laid out in the nine-patch.

NOTE: All the nine-patches should be made exactly the same.

 
Sew the fabric A, 6 ½” strip (the WOF) to the fabric B, 6½” strip (the WOF) legthways. Then sew the fabric C, 6 ½” strip (the WOF) to the other long side of the fabric B, 6 ½” strip (the WOF).


Repeat with fabric D, E and F, 6 ½” strips and the fabric G, H and I,  6 ½” strips.
Press the seams away from the lightest fabrics.
Trim the selvedges from the edge from which you will be cutting. Recut the three long strips into 6 ½” strips - now called units.
Each unit is 18 ½” long X 6 ½” wide.
You should have cut 6 units from each colour combination.
Lay out your nine-patch using one of each unit from each colour combination.
Sew the three units together to create the nine-patch.
You should have six nine-patches 18 ½” X 18 ½”


Cut each nine-patch in halves twice to create four corner units Cut once vertically through the block and once horizontally though the block.
HINT: The pieced centre square in the nine-patch is 6” wide so half way between these seams is 3".
Cut 3” away from the sewn edges. 
Each corner block is 9 ¼” square.


Once you have cut the nine-patch block into four corner units, rotate two corner blocks from opposite corners, 180°


NOTE: With every second block, rotate the opposite two corner blocks.
Sew the four corner blocks back together. The resulting Split Nine-patch block should be 18” square (unfinished)
Take the 6 ½” strips that are half the WOF and repeat the above sewing instructions to produce three more Split Nine-patch blocks.
Lay the blocks out with three rows of three blocks each so that the alternating blocks are those with different corner squares rotated.
Beautifully quilted by Elaine of 'Quilting in the Vines'
Sew the blocks together to create a square top that is 53”
Borders
Cut six 1 ½”strips the WOF from the thin border fabric.
Remove the selvedges and sew the strips together at the short ends, creating one long strip. Measure through the centre of the quilt top and cut two strips this length. (Should be 53”).   Pin and sew these onto two opposite side edges.
Measure through the centre of the quilt top including the two new sides and cut two strips this length. (Should be 55”) Sew onto the two final sides.
From the final border fabric cut six 5 ½” strips the WOF.
Remove the selvedges and sew the strips together at the short ends, creating one long strip. Measure through the centre of the quilt top and cut two strips this length. (Should be 55”).    Pin and sew these onto two opposite side edges.
Measure through the centre of the quilt top including the two new sides and cut two strips this length. (Should be  65”) Sew onto the two final sides.
Different Ideas for making the Split Nine-Patch
 An effective Split Nine-patch quilt could be made with light and dark scraps keeping the centre square as the same fabric throughout or alternatively you could make all nine fabrics scrappy.
Don’t be limited by the size we used - 6” squares. 4”, 5” or 7” blocks would still work and look great.
Rotating the squares is another area you could differ. Make a lot of corner blocks and randomly sew them together following no pattern layout at all.
 Have fun creating your own version of a Split nine-patch!
..............Penny

Kits are available              $82                $77               $80
Border fabrics are included in the kits with a Free printout of the pattern.
Postage is extra.
           Contact me for further details: anpv@ozemail.com.au

Saturday, February 11, 2012

Our new home!

I promised some photo's of our new home so here they are. We are high up on a hill overlooking a valley. We have managed to find a home for most of our furniture. My antiques fit in quite well with the modern surroundings.
 

View from my kitchen window
On a windy day my towels could end up miles away
Back deck view

Thursday, February 9, 2012

This goes with that!

As my Vintage Wheels BOM is nearing an end I have decided to take on two new BOM's by Sue Daly.
The first is her 'This goes with that' and the Fussy-cut Club. The postie delivered the packs yesterday and last night I made my first two hexagons!


Each month you receive:
    1 Pattern for 2 English Paper Pieced block designs (with papers)
    1 Superior Bottom Line Thread super bob (different colour each month)
    1 pack of size 11 needles
    4 x Fat ⅛ th's of fabrics perfect for fussy cutting
    4 x 10" squares of assorted reproduction fabrics to complement your existing stash
    Over the course of the program you will also receive 8 acrylic templates.
  In the first month you recieve a gorgeous pink project organiser and in month four you recieve a pattern  for a Tulip bag.  
Month One - my model is holding the needles and thread!

I have so many beautiful reproduction fabrics to share with participants. Stripes which are my favorites will make great secondary designs in the blocks.
Fabrics for Month One

The cost will be $38 a month plus postage so email me (Click on email me) if you want to join in!

Tuesday, February 7, 2012

Ashlyn’s quilt – A scrap quilt version of my Japanese Garden pattern

Last Christmas I made my beautiful granddaughter , Ashlyn a bright quilt using the techniques I describe in my Japanese Garden Quilt pattern. The difference was that this was made up of multiple fabrics randomly laid out . I used at least 25 fat quarters of brights. I finished the quilt by sewing a bright pink border around the edge. Ashy knew what it was straight away and cuddled it to herself stroking the fabric. Just the reaction you want when you give someone a quilt!


Sorry I don’t have a great photo of the whole quilt. Elaine from "Quilting in the Vines" quilted it for me the day I gave it to her and I literally finished the binding the night before I gave it to Ashy.
In May when I visit my son I will get a photo of the whole quilt. 

This is the original Japanese Garden pattern. If anyone who bought this wants an update on how to make the scrap version just contact me and I will email it to you.


Farewell sunny Adelaide!

Leaving all my family and friends in sunny Adelaide has been hard but rain drenched Queensland was calling and hubby and I decided to let God lead us in a new adventure!
I have made so many wonderful friends and acquaintances and can't believe how many wonderful gifts and cards I received as farewell presents. While Andrew received numerous baskets of chocolate, relishes and wine I received some amazing and thoughtful treasures. As this is a blog of my creative textile ventures I will show some of the beautiful handmade gifts I received. Some of my friends in the Vale are not only great Patchworkers but also dabble in machine embroidery and I was the lucky recipient of their time and talents.
Embroidered lace flowers on a purse doorstop as well as a Pot-Pouri sachet by Tania

Embroidered lace motifs and tassels on a silk cushion by Elaine

The lace around the edge of this antique styled cutwork tablerunner was even made by Robyn